In this article, it assumes you have the basic knowledge and understanding of:
- Vue
- Nuxt js
- TypeScript
- Vue 3: Composition API
Installation
Open your terminal and run this command npx create-nuxt-app nuxt-ts-composition-api make sure to select TypeScript, and $axios during the selection process.
I’m not gonna go through the installation process but you can refer to the official documentation nuxtjs.org/docs/2.x/get-started/installation
Then install @nuxtjs/composition-api module
npm install @nuxtjs/composition-api --save
And add this inside your nuxt.config.js file,
{
  buildModules: [
    '@nuxtjs/composition-api'
  ]
}
That is all we need but for more details head over to the official docs composition-api.nuxtjs.org/getting-started/..
Accessing the Router instance
In Nuxt without TypeScript and Composition API, the usual way of accessing the router instance is via this.$router and that gives us access to methods like push() , back() , go() and etc.
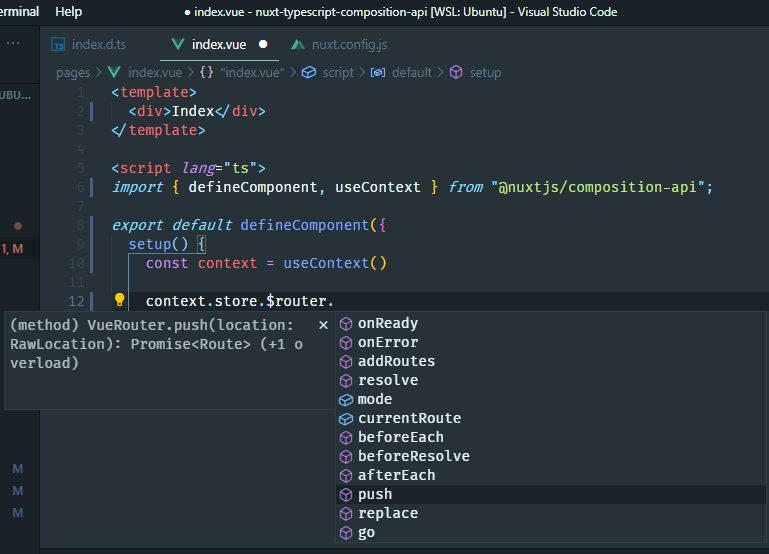
But since we are using the Composition API, we will access it from useContext() method, and it returns as the context from which we can access our Vuex store.
To access it, look at the code below:

We have to traverse into the store property then we can access the $router instance.
Accessing $axios instance
What about plugins like $axios, how do we access them?
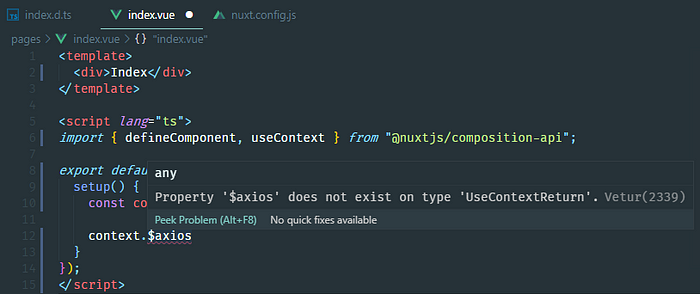
When we are not using TypeScript, we can simply access it by this code this.$axios without the IDE screaming at us that it doesn’t recognize it. But since we want to use TypeScript, it’s going to tell you it does not recognize it.
But we can access it via useContext() method right?

Unfortunately, the Vetur VSCode extension still doesn’t recognize what is $axios.
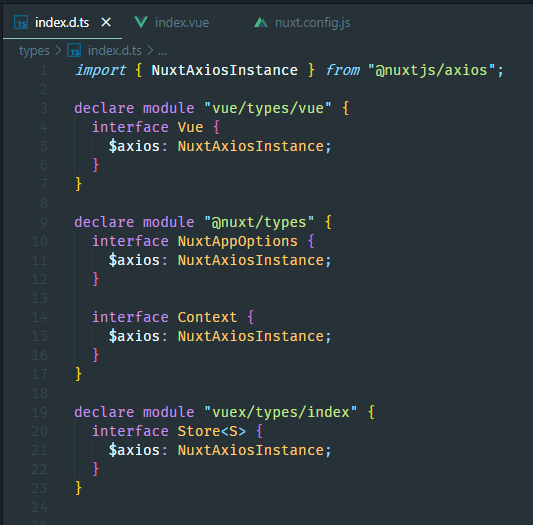
To fix that, we create a file called index.d.ts and put this in a directory called types in the root directory of our project.
- assets
- components
- layouts
- middleware
- pages
- plugins
- static
- store
- types
  - index.d.ts
Right after creating the types directory and index.d.ts file, your root project should look similar above.
Now inside the index.d.ts file, here we put our type declarations so that our IDE will recognize what is $axios and what does it return.

Now that we have added type declarations, then accessing $axios from useContext() should work now.

And now we can access to the following methods: get() , post() , delete() , put() , and etc to make our HTTP requests.
For more details regarding TypeScript type declarations, you can head over to the official docs typescript.nuxtjs.org/cookbook/plugins
Conclusion
When we have custom plugins in our Nuxt TypeScript app, we make sure to register it inside our type declaration file, I am referring to index.d.ts , so if you were new to TypeScript, files that ends with *.d.ts are considered as type declaration file for TypeScript.
I hope this saved you some time and trouble. That’s all I have to share, have a great day!
Full source code: github.com/carlomigueldy/nuxt-typescript-co..
